Friday, April 13, 2012

Linda's Quodlibet Quilt

Judy Hasheider of Quilt with Judy designed the pattern Quodlibet.  The quilt is normally made with a black or dark sashing or leading fabric. 

Linda changed her sashing fabric to white and used an orange color theme.  The fabric choices throughout her quilt are amazing.  I recognize a number of the fabrics as hand dyed fabrics from Quilts by Barb.

Judy's original pattern is show above.   The pattern for this quilt is available at www.quiltwithjudy.com
Linda said this quilt just continued to grow.  She added two pieced borders and two plain borders.  When quilting the quilt, I treated the inner pieced border as paft of the inside of the quilt.  I used a peach colored thread throughout all the quilting on the quilt.  It shows, but blends nicely with both the inside of the quilt and the borders.  This quilt has very sharp geometric designs so I used modern, fun circular designs in the quilting. 


I just kept taking pictures of this quilt!  There was so much fun stuff to see.  I just love the colors. 

For those of you who attended the 2011 Quilt Retreat Getaway Weekend sponsored by Quilts by Barb, can you pick out the Yard that Keeps on Going??


Linda hasn't even seen her quilt yet since I completed the quilting.  I will be delivering it to her next week.

Thought you would enjoy sharing another beautiful quilt with me.

Happy Quilting!

Barb


Thursday, April 12, 2012

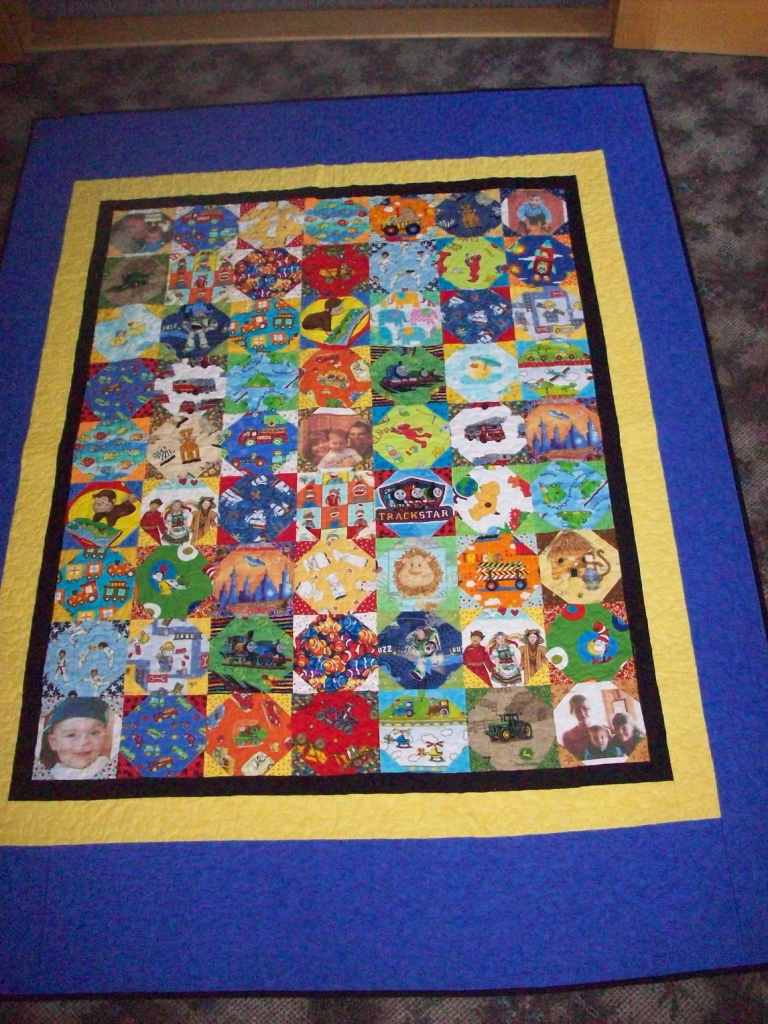
Judy's I Spy Quilt

I have been working on some great quilts lately.  Today I am going to show you Judy's quilt that she made for her grandson, Max.


A close up.  Note the picture Judy added. 
This also shows a picture and some of the fun blocks. 
She used a very simple snowball setting for the blocks.

A full length view of the quilt.  I did an all over meander or "Bare Bones" quilting on it. 
 Works great for kids quilts.


The back is as fun as the front.  She used up the left over fabrics and
 put strips of them on the back of the quilt.


And, get a load of that wonderful label on the back of the quilt. 
 That is a picture of Judy with her grandson, Max.

Just thought this was too great to not share.

Happy Quilting!  Barb

Friday, March 30, 2012

Mary Kay's Road to Retreat Quilt

Finished quilting this quilt this morning.  It was constructed by Mary Kay, starting at our 2011 Quilt Retreat Getaway Weekend.  Mary Kay is a fairly new quilter and did an excellent job.  The pattern was an original pattern by Diane Lapacek, our teacher for all our Quilt Retreat Getaway Weekends.

Close Up Picture


Get a load of that great pieced border!


A close up of the center of the quilt. 

 Great job by Mary Kay on the piecing and Diane on the designing.  I did "Bare Bones" quilting on the quilt and it looks great. 

Mary Kay got a 10% discount on the quilting.  This is a perk you get from attending our retreats.  All quilts started at our retreats from our retreat patterns get a discount on the quilting.

Just thought I would share another great quilt.

Barb

Tuesday, March 27, 2012

Carolyn's Quilt - Wing and a Prayer / Tonga Rhapsody

Just wanted to share a beautiful quilt I finished quilting and binding last evening.  This quilt was made as a block of the month.  It was constructed by Carolyn and I custom machine quilted it.


I have included closeups and an almost full picture of the quilt.  The quilt was a large queen, 92 X 108.

Enjoy looking and Happy Quilting!

Barb


Sunday, March 18, 2012

Preparing a GOOD Quilt Backing

Quilt Backings

One of my most asked questions is, "How do I make a GOOD quilt backing?" I have this as a handout on my website but I thought I would also share it with you here.

Preparing the Backing for the Quilt

Measure finished length and width of quilt, through the middle. Write down both measurements.

  1. The completed quilt back will be 6 inches longer and 6 inches wider than the completed quilt top.
  2. Prepare backing material. Tear a piece from the end of your backing fabric to find the straight grain of the backing fabric. Measure lengthwise on backing fabric to the measurement of either the width or the length of your quilt top PLUS the 6 inches. Make a small snip along the selvage and TEAR across the width of the fabric. The backing may be pieced EITHER horizontally or vertically, it doesn’t matter. The only time this matters is if you have a one way design, then you should piece your backing so the design runs the proper way on the back of your quilt.
  3. Repeat step 3 until you have enough lengths to cover back of quilt top PLUS the additional 6 inches.
  4. Remove both selvages from all lengths. Press all lengths, using steam to remove the center crease.
  5. Pin together two of the lengths of fabric. Sew lengths together. Press the seams open. After pressing the seam open, turn your backing over to the right side of the fabric and press the seam from the front. This will make that seam lay perfectly both during quilting and after the quilt is finished. Repeat with 3rdlength of fabric if necessary.
  6. Measure across the width of the sewn together pieces. Snip at the necessary measurement. If the seams will be going crosswise on the back, this measurement will be the width PLUS 6 inches. Tear down length of fabric.

How simple is that? You now have your perfect quilt backing.